

1. Standing side stretch
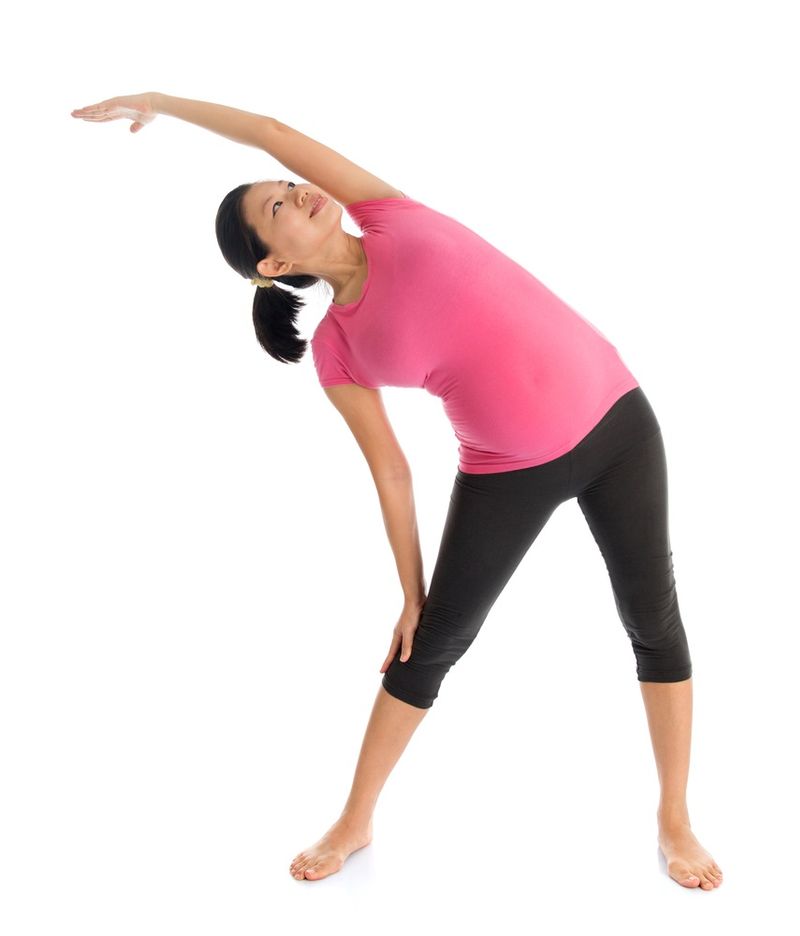
Target areas: Shoulders and upper back.
Benefits: Reduce back pain, improve upper body flexibility, and reduce shoulder stiffness (especially if you work in an office for most of the day).
How to do it: Stand in the classic mountain pose (Tadasana) with your arms at your sides, your big toes touching each other, and your heels slightly spread apart. Raise your arms and interlace your fingers over your head with your index fingers pointing upwards.
Draw an invisible arch with your arms, extending them to your side as far as possible while pushing your hip in the opposite direction. Make sure you keep your arms straight.
Move your arms back to the center and stretch to the other direction, holding the pose at maximum range for 30-60 seconds at a time.
You can also try doing this pose while seated (the sitting side stretch).
2. Wide knee child’s pose

Target areas: Belly, back, and hips.
Benefits: Relieves the pressure of a growing belly, widens your hips (which reduces the risk of complications during birth), relieves back pain, and helps lower stress and anxiety.
How to do it: Kneel on a yoga mat, making sure your heels are touching your butt and your big toes are touching. Gently lay your chest down and let your forehead touch the mat. Extend your arms straight ahead of you with your palms resting flat on the ground.
Relax and hold this pose for 3-5 minutes. You’ll immediately notice its restorative effects both for your body and mind.
A variation of this pose you can try is extending your arms backward along your sides rather than in front of you.
3. Bound angle pose (Baddha Konasana)
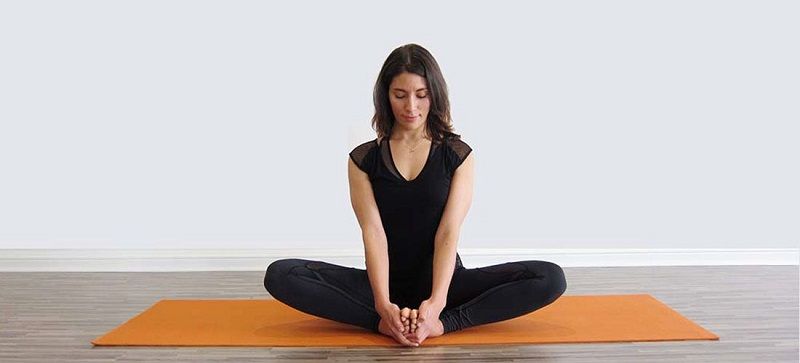
Target areas: hips, thighs, and knees.
Benefits: Opens hips and thighs wider for easier childbirth, eases knee pain, helps with sore or swollen feet, and reduces overall body fatigue.
How to do it: Sit on the floor with your legs stretched straight in front of you. Bend your knees and pull your heels closer to your pelvis. Drop your knees sideways as far as they can get. Don’t force them all the way down if your hips are tight. Just try to relax your thighs and hips as much as you can.
With your thighs to the sides and the soles of your feet pressing against each other, try to pull in your heels as much as you can. Then grasp the big toe or ankle of each foot with your hands.
Hold this pose for 1-5 minutes. Repeat it regularly if your hips and groin feel tight. It will improve flexibility and open up your hips.
4. Cat-cow pose (Marjaryasana Bitilasana)
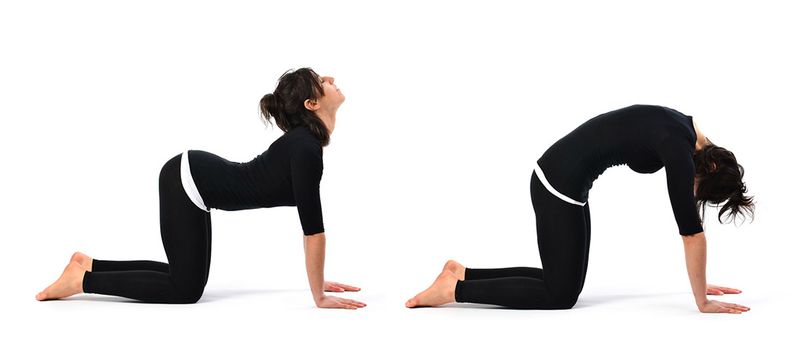
Target areas: back, belly, hips, and shoulders.
Benefits: Relieves back and shoulder pain, reduces belly pressure, and opens up the hips. It also prepares your body for back labor in case it occurs during delivery.
How to do it: This is one of the simplest yoga poses. It’s especially great in the later trimesters when your belly has grown bigger and feels heavy.
There are two parts to this pose; the cat part and the cow part.
Get on all fours making sure that your hands are straight with your shoulders directly above your wrists. Your thighs between the hips and knees should also be straight.
Start with the cow part. Lower your belly downwards, raise your butt and lift your head. It should look like a big downward curve from your head to your butt. Inhale as you get into this pose.
Hold for a few seconds and then exhale as you create an upwards curve. Draw in your belly as you raise your back upwards and lower your head to look inwards at your belly. This is the cat part of the pose.
Alternate between the two poses as you inhale and exhale.
5. Yoga squat (Malasana)

Target areas: belly, hips, and pelvis.
Benefits: This is one of the best poses if your hips are feeling too tight. It also helps to widen the pelvis, which makes childbirth easier.
How to do it: Sit on the floor with your legs spread out in front of you. Bend your knees upwards one at a time, bringing your foot as close to your butt as possible. The knees should be slightly wider than your shoulder width.
Slowly lift off your butt, putting weight onto your feet, and hold that lifted pose for several seconds.
If this feels too strenuous, you can also try a supported yoga squat where you sit on a low stool or block.
6. Easy pose (Sukhasana)
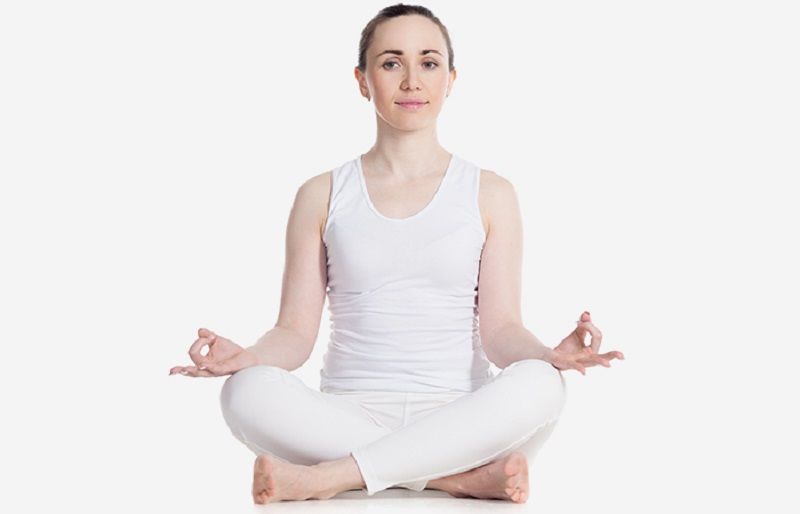
Target areas: back and hips.
Benefits: This is more of a meditation pose. It calms the mind and helps fight stress and anxiety. It’s also great for opening up the hips and reducing lower back pain.
How to do it: Sit on a yoga mat and cross your shins. The soles of your feet should be facing outwards under the opposite leg. Your legs should form a triangle, with your crossed shins forming a sort of a straight line.
You can lay your hands on your knees with the palms facing up or down. If you feel uncomfortable, fold a blanket and sit on it.
Hold this pose for as long as you feel comfortable, then cross your shins the other way and hold again.
Feel free to try some relaxing meditation.
7. Corpse Pose (Savasana)

Target areas: Your mind.
Benefits: This pose is incredibly relaxing. It’s perfect for meditation when you are feeling stressed or a bit anxious about the pregnancy.
How to do it: Savasana is usually performed by lying on your back. But since that’s not good for your pregnancy, do it while lying on your side.
I recommend using a pregnancy pillow under your head and another under your knees and legs. You can also add another one under your belly if you feel you need more support.
Lie down relaxed as if you are in bed. Hold the pose for 3-5 minutes or as long as you want.

You must be logged in to post a comment.